Category: Multimedia
-
Ventilators: How?
A shorter version of Ventilators: Why, What, How, When? featuring how-to use the ventilator demonstrations only. Made by UK Paramedics, this demonstrates how to use the PneuPac ParaPac ventilator.
Read more:
Ventilators: Why, What, How, When?
How do I get the ventilator off the racks?
What is the relief pressure dial on the ventilator?
The Discovery of Negative and Positive Pressure Ventilation – Fast Fact
What is positive pressure breathing?
What is Negative Pressure Breathing?
Disclaimer
You must read the full disclaimer at www.article999.co.uk/about/ (disclaimer tab) before putting into place anything you see here. Useful information is available in the text on this video, so if you only listen to the narration you will miss important facts. The ventilation settings mentioned in this video are what is recommended by Smiths Medical, current guidelines and some articles – however, as with all topics, there is always varying information available online & alternative expert advice, and no video can cater for all of that. Similarly, this video is intended to demonstrate how to use equipment & to introduce or remind you to the Why, What and When of ventilators – not to tell you that you should or shouldn’t be using it. That is dependent on local guidelines, your research & your choice as a clinician. This video merely highlights the varying advice regarding tidal volume settings, and in the text points out the potential problems with some of the figures. No specific volume is recommended.
Transcript
Article 999. Ventilators: Why, What, How, When?
This video has been made by UK Paramedics following guidelines. It is not endorsed by any author, organisation or Ambulance Trust. You must read the full disclaimer at www.article999.co.uk/about/ and refer to your local guidelines before putting into place anything you see here. This video is intended to demonstrate how to use the ventilator according to use guides and guidelines – not to tell you that you should or shouldn’t use it. That decision is up to you and should be dependent on local guidelines and your own research. This is what the textbooks, the manufacturer and a few articles say & is not intended to represent the expert opinions or experience of others within healthcare.
Remember hand hygiene, bare below the elbows and gloves in real life.
How?
- To remove the ventilator from the racks, pull the flap to the side and push the ventilator up. To put it back in, simply push it down and pull the flap to the side again.
- To connect to the gas supply, push the hose into the socket and twist. It’s the same when connecting to a portable oxygen cylinder.
- When you turn it on, the ventilator should complete a self check. The alarm lights should flash in sequence, there should be one burst of the high pressure audible alarm, and the orange indicator should flash for 60 seconds.
- Next, check the indicator shows white for O2.
- Connect the patient circuit [shown in video].
- Next on the list, adjust the ventilation parameters. Set the air mix control to no air mix for respiratory arrest or CPR. Set the relief pressure control to 40. Set the respiratory rate to 12. As for the tidal volume, it varies massively as you can see on the screen. It depends on whether you opt for an average value or base it on the patient’s weight. Smiths Medical (2017) advise 800-900ml on their training video, [but this may not be advisable] but don’t worry too much about the slight differences in tidal volume because the PneuPac features a high pressure alarm that we’ll discuss shortly. The alarm will help you identify if the tidal volume is too high for your patient.
(Gregory & Mursell, 2010: 44; Pilbery & Lethbridge, 2016: 189; Baker, 2012; Smiths Medical, 2017)
The following demonstrate the variance in researched texts and guidelines – not necessarily the advised settings:
400-600ml Baskett, 1996 500-600ml Perkins et al, 2015 600ml Baker, 2016 800-900ml Smiths Medical, 2017 – may not be advisable due to risks of barotrauma. See below 6-8ml/kg Bocklage & Balk, 2017; Frakes, 2007 10ml/kg or 5-8ml/kg Baker, 2012 – depending on the extent of the risk of barotrauma 7. Next, temporarily occlude the patient connection. The relief pressure monitor should go to the maximum setting – i.e. 40cmh20.
(Gregory & Mursell, 2010: 44; Pilbery & Lethbridge, 2016: 189; Baker, 2012; Smiths Medical, 2017)
What do the audible warnings mean?
- Top left is the high pressure alarm
- Top right is low pressure
- Bottom left is the battery indicator
- The middle one tells you when breathing is detected by the ventilator
(Smiths Medical, 2017)
High pressure = excessive tidal volume, incorrect airway position, kinked ET tube, or incorrect ventilation settings.
If the pressure is reaching it’s max, there may be something wrong with the circuit.If you’ve checked the above and the alarm is still sounding, Smiths Medical (2017) advise that your tidal volume setting might simply be too high.
Low pressure = leakage or insufficient tidal volume/settings, faulty valve in the patient’s circuit
This alarm tends to occur when pressure drops below 10cmh20Earlier, I pointed out the alarm in the middle, at the bottom. This is SMMV. It’s an indicator that will flash green if the patient is breathing for themselves. The ventilator will assist if the patient breathes with less than 150ml of tidal volume. Between 150-400ml the ventilator will extent the exhalation time to allow the patient to complete their own breath, and above 400ml the ventilator will allow the patient to breathe and will not assist, but may still assist on the next breath if required (Smiths Medical, 2017; Baker, 2012).
Extra facts:
McCarty et al (2012) found that ‘ventilation rates and tidal volumes commonly exceeded Guideline recommendations. This resulted in […] excessive mean airway pressure’
Smiths Medical (2017) advise that peak inflation pressure should be below 20cmh20 when using a mask to ventilate due to the issues of too high pressure
Inspiration to Expiration should be 1:2 (Smiths Medical, 2017; Baker, 2012)
References
Baker, D. 2012. Emergency and Transport Ventilation, an introductory guide, Smiths Medical International Limited: Luton
Baker, D.J. 2016. Artificial Ventilation: A Basic Clinical Guide. Springer International: Switzerland
Baskett, P. et al. 1996. ‘Tidal volumes which are perceived to be adequate for resuscitation’, Resuscitation, 31 (3), pp. 231-4
Bocklage, T. & Balk, R.A. 2017. Setting the Tidal Volume In Adults Receiving Mechanical Ventilation: Lessons
Learned From Recent Investigations, Available Online: https://www.nbrc.org/wp-content/uploads/2017/07/Setting-the-Tidal-Volume.pdf (Accessed 17/12/17)
Frakes, M. 2007. Ventilation Modes and Monitoring, Available Online: http://www.rtmagazine.com/2007/02/ventilation-modes-and-monitoring/ (Accessed 17/12/17)
Gregory, P. and Mursell, I. 2010. Manual of Clinical Paramedic Procedures, West Sussex: John Wiley & Sons
McCarty, K. et al, 2012. Ventilation rates and tidal volume during emergency department cardiac resuscitation, Resuscitation, 83: 4, p45
Owen, R. and Castle, M. 2006. ‘EtCO2: the key to effective prehospital ventilation’, Emergency Medical Journal, 23 (7), pp. 578-579
Perkins, G.D. 2015. European Resuscitation Council Guidelines for Resuscitation 2015: Section 2. Adult basic life support and automated external defibrillation, Available Online: https://ercguidelines.elsevierresource.com/european-resuscitation-council-guidelines-resuscitation-2015-section-2-adult-basic-life-support-and/fulltext#back-bib0760 (Accessed 17/12/17)
Pilbery, R. & Lethbridge, K. 2016. Ambulance Care Practice, Bridgwater: Class Professional Publishing
Smiths Medical, 2017. ‘Pneupac – ParaPAC’, Pneupac Transport Ventilators – Breathe Easy, Available Online: https://www.smiths-medical.com/resources/pneupac-transport–ventilators—breathe-easy (Accessed 27/10/17)
With thanks to Smiths Medical for their correspondence and information
Music:
Dobroide, 2010. 20091229.ambulance.siren.wav. Available Online: https://freesound.org/people/dobroide/sounds/8713/ (Accessed 21/08/17)Productiontrax.com
Images:
Article 999’s own or licenses purchased via Adobe Stock & Dreamstime
Feedback is welcome & responded to. Stay tuned for more content!
Displayed on one of our ‘Fast Facts’ pages. Click on the image for the link & reference! -
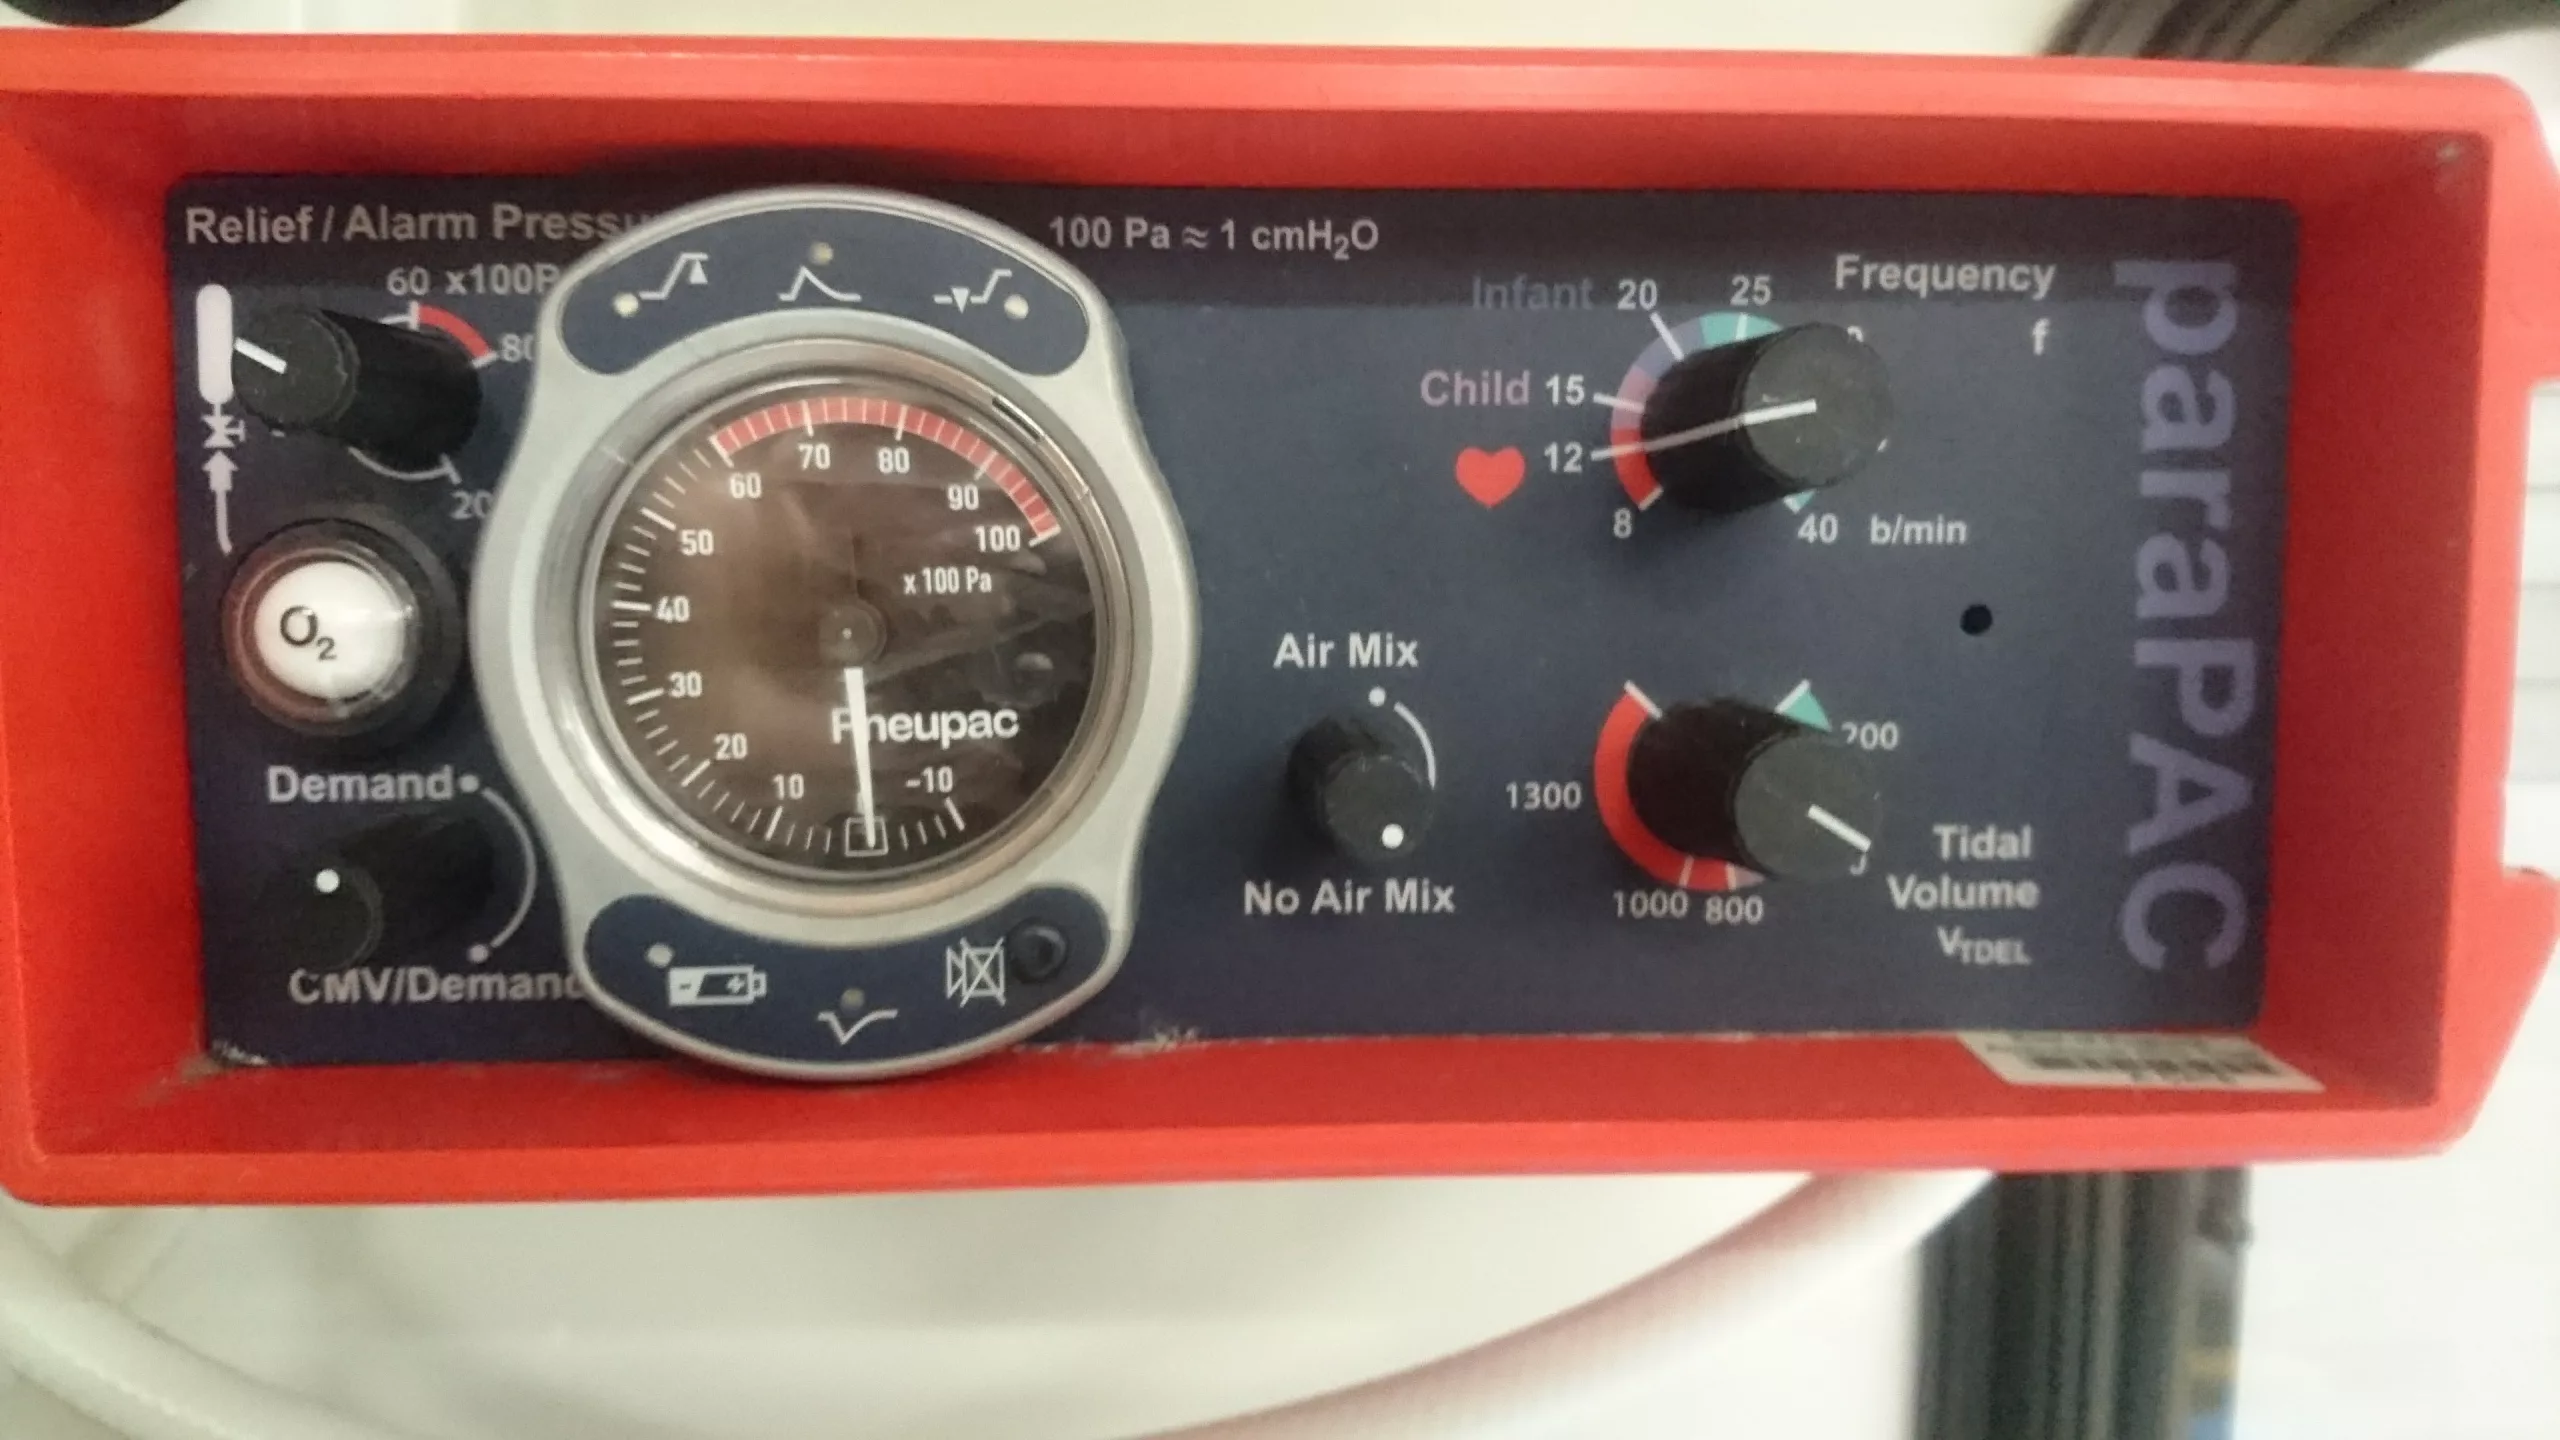
Ventilators: Why, What, How, When?
Made by UK Paramedics, this video demonstrates how to use the PneuPac ParaPac ventilator.
Read more:
How do I get the ventilator off the racks?
What is the relief pressure dial on the ventilator?
What is positive pressure breathing?
What is Negative Pressure Breathing?
The Discovery of Negative and Positive Pressure Ventilation – Fast Fact
Disclaimer
You must read the full disclaimer at www.article999.co.uk/about/ (disclaimer tab) before putting into place anything you see here. Useful information is available in the text on this video, so if you only listen to the narration you will miss important facts. The ventilation settings mentioned in this video are what is recommended by Smiths Medical, current guidelines and some articles – however, as with all topics, there is always varying information available online & alternative expert advice, and no video can cater for all of that. Similarly, this video is intended to demonstrate how to use equipment & to introduce or remind you to the Why, What and When of ventilators – not to tell you that you should or shouldn’t be using it. That is dependent on local guidelines, your research & your choice as a clinician. This video merely highlights the varying advice regarding tidal volume settings, and in the text points out the potential problems with some of the figures. No specific volume is recommended.
Transcript
Article 999. Ventilators: Why, What, How, When?
This video has been made by UK Paramedics following guidelines. It is not endorsed by any author, organisation or Ambulance Trust. You must read the full disclaimer at www.article999.co.uk/about/ and refer to your local guidelines before putting into place anything you see here. This video is intended to demonstrate how to use the ventilator according to use guides and guidelines – not to tell you that you should or shouldn’t use it. That decision is up to you and should be dependent on local guidelines and your own research. This is what the textbooks, the manufacturer and a few articles say & is not intended to represent the expert opinions or experience of others within healthcare.
Remember hand hygiene, bare below the elbows and gloves in real life.
Why use the ventilator?
Research suggests that mechanical ventilators can reduce the variability of breath timings & as a result, capnography readings. They can also increase the likelihood of ‘effective ventilation’ (Owen and Castle, 2006)
To quote from Gregory & Mursell (2010: 47) ‘A high flow rate over a short inflation time inevitably produces a high peak airway pressure in an unprotected airway [as with BVM technique]. High peak airway pressure overcomes the pressure of the lower oesophageal sphincter and causes gastric inflation. […] Use of […] mechanical ventilation may help to overcome the high pressures involved. […] In an intubated patient or a patient with an LMA in situ, use of a mechanical ventilator has been shown to allow paramedics to accomplish extra tasks, document better, and provide better patient care’ (Gregory & Mursell, 2010: 47)
What?
This is a time-cycled, volume preset flow generator (Baker, 2012). In other words, the pressure can vary, volume is always the same, and the air must be delivered within a preset time, which helps to control the tidal volume.
There are many different types. One of the most common ones in UK ambulances at this time (Gregory & Mursell, 2010: 44) is the Pneupac paraPAC (Smiths Medical, 2017) but the ParaPac Plus may soon replace it.
Here are the useful parts:
The supply gas failure alarm
The inlet connection
The relief pressure control
The ‘main pneumatic switch’
Air mix control
Inflation pressure monitor
Frequency control
Tidal volume control
(Pilbery and Lethbridge, 2016: 189)How?
- To remove the ventilator from the racks, pull the flap to the side and push the ventilator up. To put it back in, simply push it down and pull the flap to the side again.
- To connect to the gas supply, push the hose into the socket and twist. It’s the same when connecting to a portable oxygen cylinder.
- When you turn it on, the ventilator should complete a self check. The alarm lights should flash in sequence, there should be one burst of the high pressure audible alarm, and the orange indicator should flash for 60 seconds.
- Next, check the indicator shows white for O2.
- Connect the patient circuit [shown in video].
- Next on the list, adjust the ventilation parameters. Set the air mix control to no air mix for respiratory arrest or CPR. Set the relief pressure control to 40. Set the respiratory rate to 12. As for the tidal volume, it varies massively as you can see on the screen. It depends on whether you opt for an average value or base it on the patient’s weight. Smiths Medical (2017) advise 800-900ml on their training video, [but this may not be advisable] but don’t worry too much about the slight differences in tidal volume because the PneuPac features a high pressure alarm that we’ll discuss shortly. The alarm will help you identify if the tidal volume is too high for your patient.
(Gregory & Mursell, 2010: 44; Pilbery & Lethbridge, 2016: 189; Baker, 2012; Smiths Medical, 2017)
The following demonstrate the variance in researched texts and guidelines – not necessarily the advised settings:
400-600ml Baskett, 1996 500-600ml Perkins et al, 2015 600ml Baker, 2016 800-900ml Smiths Medical, 2017 – may not be advisable due to risks of barotrauma. See below 6-8ml/kg Bocklage & Balk, 2017; Frakes, 2007 10ml/kg or 5-8ml/kg Baker, 2012 – depending on the extent of the risk of barotrauma 7. Next, temporarily occlude the patient connection. The relief pressure monitor should go to the maximum setting – i.e. 40cmh20.
(Gregory & Mursell, 2010: 44; Pilbery & Lethbridge, 2016: 189; Baker, 2012; Smiths Medical, 2017)
What do the audible warnings mean?
- Top left is the high pressure alarm
- Top right is low pressure
- Bottom left is the battery indicator
- The middle one tells you when breathing is detected by the ventilator
(Smiths Medical, 2017)
High pressure = excessive tidal volume, incorrect airway position, kinked ET tube, or incorrect ventilation settings.
If the pressure is reaching it’s max, there may be something wrong with the circuit.If you’ve checked the above and the alarm is still sounding, Smiths Medical (2017) advise that your tidal volume setting might simply be too high.
Low pressure = leakage or insufficient tidal volume/settings, faulty valve in the patient’s circuit
This alarm tends to occur when pressure drops below 10cmh20Earlier, I pointed out the alarm in the middle, at the bottom. This is SMMV. It’s an indicator that will flash green if the patient is breathing for themselves. The ventilator will assist if the patient breathes with less than 150ml of tidal volume. Between 150-400ml the ventilator will extent the exhalation time to allow the patient to complete their own breath, and above 400ml the ventilator will allow the patient to breathe and will not assist, but may still assist on the next breath if required (Smiths Medical, 2017; Baker, 2012).
When?
– AACE (2016) recommend considering ventilation if a ptn’s o2 sats <90 on high con o2,
if the RR is <10 or >30 bpm or if there is ‘inadequate chest expansion’ (p42) but the mechanical ventilator is to be used …
– for ’emergency and transport ventilation’ in 5kg + patients (Smiths Medical, 2017)Extra facts:
McCarty et al (2012) found that ‘ventilation rates and tidal volumes commonly exceeded Guideline recommendations. This resulted in […] excessive mean airway pressure’
Smiths Medical (2017) advise that peak inflation pressure should be below 20cmh20 when using a mask to ventilate due to the issues of too high pressure
Inspiration to Expiration should be 1:2 (Smiths Medical, 2017; Baker, 2012)
References
Baker, D. 2012. Emergency and Transport Ventilation, an introductory guide, Smiths Medical International Limited: Luton
Baker, D.J. 2016. Artificial Ventilation: A Basic Clinical Guide. Springer International: Switzerland
Baskett, P. et al. 1996. ‘Tidal volumes which are perceived to be adequate for resuscitation’, Resuscitation, 31 (3), pp. 231-4
Bocklage, T. & Balk, R.A. 2017. Setting the Tidal Volume In Adults Receiving Mechanical Ventilation: Lessons
Learned From Recent Investigations, Available Online: https://www.nbrc.org/wp-content/uploads/2017/07/Setting-the-Tidal-Volume.pdf (Accessed 17/12/17)
Frakes, M. 2007. Ventilation Modes and Monitoring, Available Online: http://www.rtmagazine.com/2007/02/ventilation-modes-and-monitoring/ (Accessed 17/12/17)
Gregory, P. and Mursell, I. 2010. Manual of Clinical Paramedic Procedures, West Sussex: John Wiley & Sons
McCarty, K. et al, 2012. Ventilation rates and tidal volume during emergency department cardiac resuscitation, Resuscitation, 83: 4, p45
Owen, R. and Castle, M. 2006. ‘EtCO2: the key to effective prehospital ventilation’, Emergency Medical Journal, 23 (7), pp. 578-579
Perkins, G.D. 2015. European Resuscitation Council Guidelines for Resuscitation 2015: Section 2. Adult basic life support and automated external defibrillation, Available Online: https://ercguidelines.elsevierresource.com/european-resuscitation-council-guidelines-resuscitation-2015-section-2-adult-basic-life-support-and/fulltext#back-bib0760 (Accessed 17/12/17)
Pilbery, R. & Lethbridge, K. 2016. Ambulance Care Practice, Bridgwater: Class Professional Publishing
Smiths Medical, 2017. ‘Pneupac – ParaPAC’, Pneupac Transport Ventilators – Breathe Easy, Available Online: https://www.smiths-medical.com/resources/pneupac-transport–ventilators—breathe-easy (Accessed 27/10/17)
With thanks to Smiths Medical for their correspondence and information
Music:
Dobroide, 2010. 20091229.ambulance.siren.wav. Available Online: https://freesound.org/people/dobroide/sounds/8713/ (Accessed 21/08/17)Productiontrax.com
Images:
Article 999’s own or licenses purchased via Adobe Stock & Dreamstime
Feedback is welcome & responded to. Stay tuned for more content!
Displayed on one of our ‘Fast Facts’ pages. Click on the image for the link & reference! -

How do I get the ventilator off the racks?
If you’ve ever felt the frustration of being a student on Day 1 and having to retrieve the ventilator for your crewmate, you might enjoy this GIPHY.
-
What is the relief pressure dial on the ventilator?
This article refers to the workings of Smith’s Medical Pneupac ParaPac and the newer ParaPac Plus. Other transport ventilators may vary in their settings and processes. Please check what unit your ambulance trust has before following the information here.
[tabby title=”Detail”]
The pressure of air inside our lungs is normally just right to not only ensure that negative pressure breathing occurs but also to prevent a shunt (where blood bypasses the lungs) (Hess & Kackmarek, 2014: 431), the oesophageal spinchter from opening, causing air to enter the stomach (Baker, 2012: 1), and a host of other potential problems. Any means of supported ventilation where the patient is not breathing for themselves produces positive pressure ventilation. Not only does this change the way air enters the patient’s lungs while they are ventilated, but it also comes with all of the above risks if any of the settings are incorrect, and more.
Many of the effects ‘are related to mean airway pressure [which is] […] the average pressure applied to the airway during the ventilatory cycle’ (Hess & Kackmarek, 2014: 420) With too ⇑ pressure comes ⇓ venous return (Hess & Kackmarek, 2014: 420) and ⇑ chance of barotrauma (Baker, 2016: 75).
To summarise, the potential negative effects are:
- Blood bypassing the lungs (a shunt) (Hess & Kackmarek, 2014: 431)
- Air entering the stomach (Baker, 2012: 1)
- Venous return decreasing (Hess & Kackmarek, 2014: 420)
- Barotrauma (Baker, 2016: 75)
Because modern ventilators are volume-controlled, preventing a different problem that occurs during pressure-controlled ventilation, there is a set tidal volume which the ventilator will always provide to the patient. To provide this volume, the pressure will constantly increase until the volume is reached (Baker, 2016: 132).
The Means of Avoiding These Problems
In ventilators, the pressure of an oxygen cylinder ‘is lowered through a reducing valve down to 30-90psi’ from 2000psi. It’s then delivered to the patient ‘to a maximum of 40cmh20 or 60cmh20’, (Baker, 2012: 18)*, depending on whether you’re in the UK or the US.
*cmh20 = centimetres of water pressure (SensorsONE, 2017)
Since we can’t have too much pressure there needs to be a way of stopping the ventilator if things get awry. The relief pressure is what this refers to. Via a safety valve (Baker, 2012), otherwise known as ‘exhaust valves’ the supply is cut and excess peak inspiratory pressure (PIP) is released into the atmosphere (Zaconeta et al, 2010), ‘prevent[ing] over-ventilation of the lungs’ (Baker, 2016: 145)
Why would the pressure get this high anyway?
- ‘The patient circuit […] [could be] blocked or kinked’ (Baker, 2016: 142). Best to check it.
- ‘If the lung compliance[*] is low and the airway resistance is high the pressure can rise to high levels’ because, as above, the pressure will keep rising until the set tidal volume is delivered (Baker, 2016: 142).
- The wrong relief pressure settings.
*Compliance ‘refers to the ease of expansion of the lungs and the walls of the thorax’ (Baker, 2012: 8). Ordinarily, according to Baker (2012: 8), the value is 100 cmh20 but when ventilated it’s 40-50cmh20. Physical injuries and medical conditions may further alter this figure.
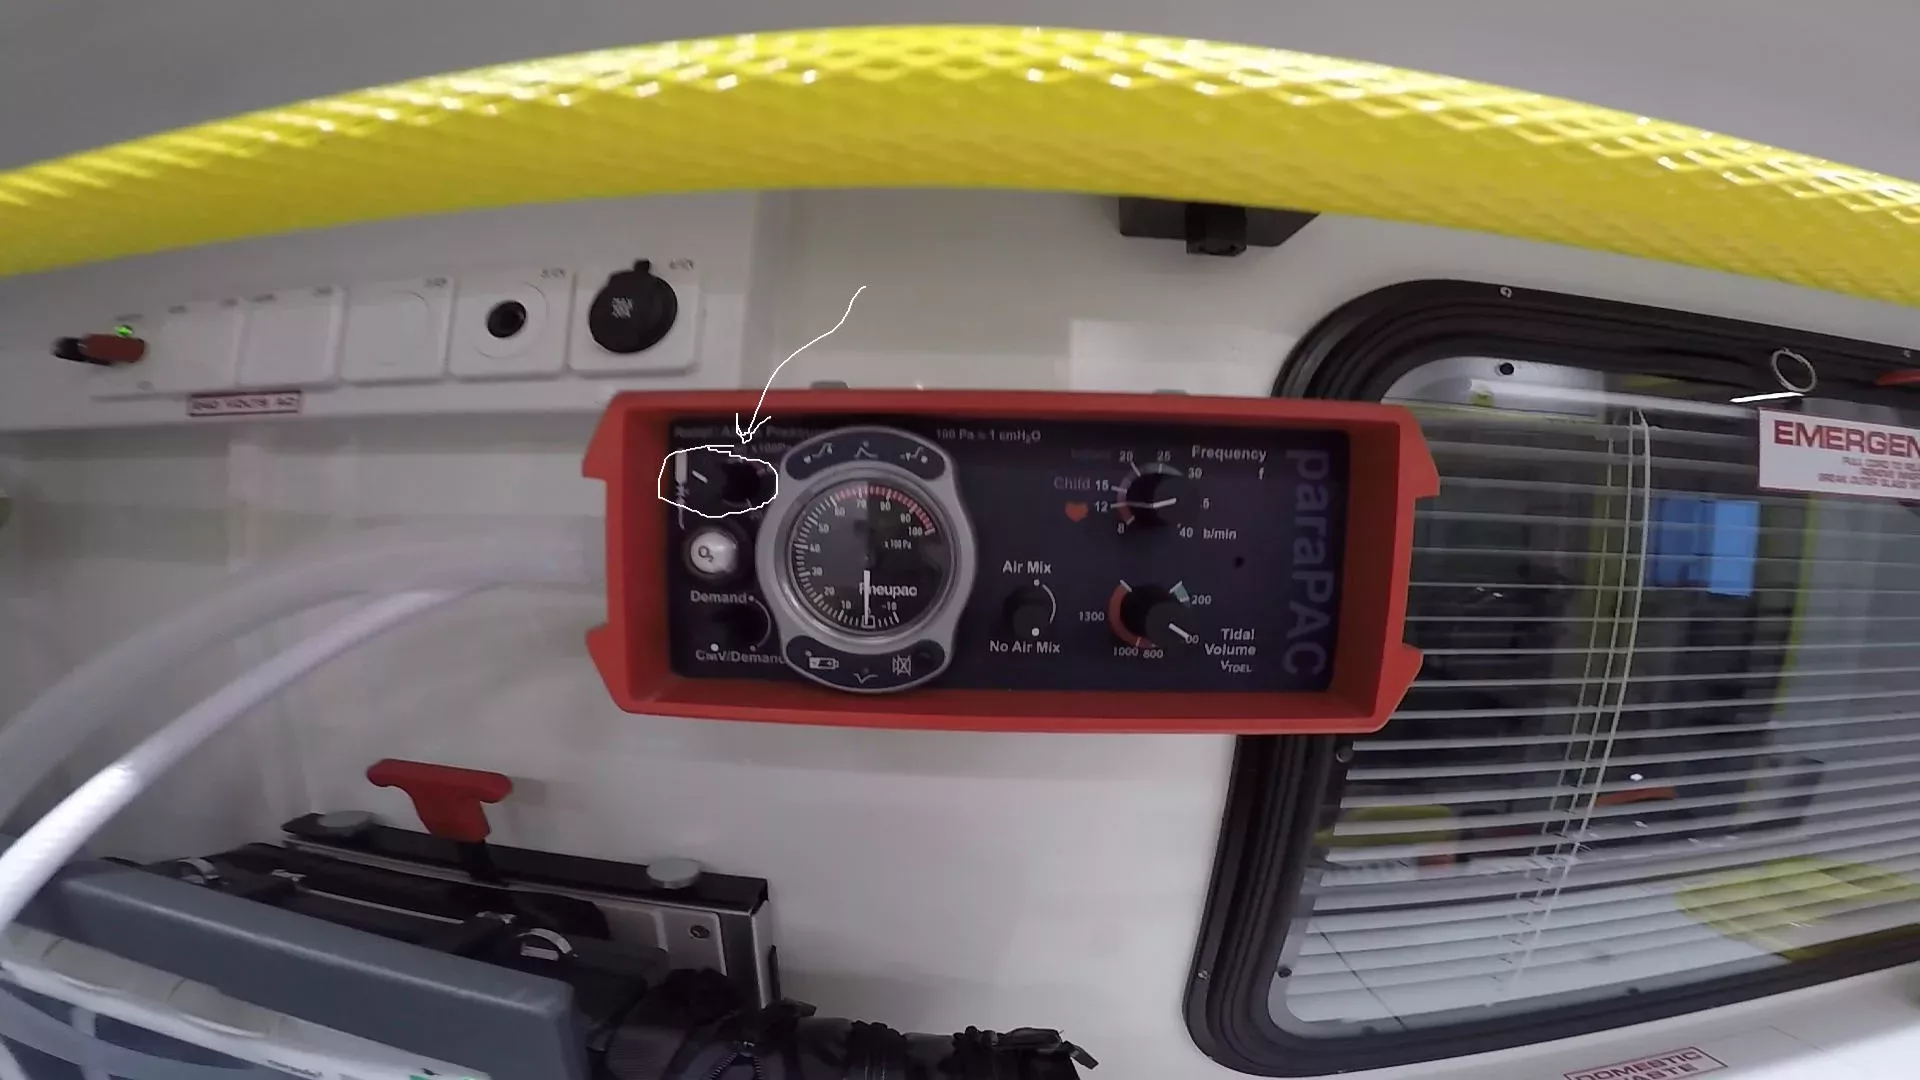
Which dial are you talking about?
This one

The Pneupac ParaPac (Smiths Medical). Photo highlights the Relief Pressure dial. What should I set it to?
40cmh20 if you’re in the UK (Baker, 2012)
Why is the relief pressure set at 40cmh20 in the UK? Why is it 60cmh20 in the US?
Article 999 is struggling to find the answers to these questions. If you know the answers, please get it touch. It would be great to add the information to this resource.

This post is yet to be peer reviewed. Please get in touch if you have any comments. [tabby title=”Super Summary”]
Article 999 previously posted an article on positive pressure ventilation, including its risks. The aim of positive pressure ventilation is to ‘maximise the potential benefit of mechanical ventilation while minimizing the potential for harm’ (Hess & Kackmarek, 2014: 407). The relief pressure dial on the ventilator ensures that the pressure of ventilation is not so high as to cause blood bypassing the lungs (Hess & Kackmarek, 2014: 407), the oesophageal spinchter opening (Baker, 2012: 1), barotrauma (Baker, 2016: 75; Hess & Kackmarek, 2014) and more. The ventilator’s other settings ensure that the patient actually receives ventilation, but the relief pressure setting ensures that a valve drains excess air when settings, poor setup, or the patient’s lung compliance (Baker, 2016: 43) have caused the pressure to get to high.
What should I set it to?
40cmh20 (Baker, 2012)
What should I look out for if the pressure is too high?
Kinked tubing (Baker, 2016: 142) & your settings
Read more in the Detail tab.
[tabby title=”Prefer to see a diagram? Check out the mind-map summary”]

[tabby title=”References”]
References
Baker, D. 2012. Emergency and Transport Ventilation, an introductory guide, Smiths Medical International Limited: Luton
Baker, D.J. 2016. Artificial Ventilation: A Basic Clinical Guide. Springer International: Switzerland
Hess, D.R. & Kacmarek, R.M. 2014. Essentials of Mechanical Ventilation. McGraw Hill Education: New York
SensorsONE, 2017. cmh20 – Centimetres of Water Column at 4 deg C Pressure Unit, Available Online: https://www.sensorsone.com/cmh2o-centimetres-water-column-4-deg-c-pressure-unit/ (Accessed 16/11/17)
Zaconeta, C.A.M. et al, 2010. ‘Evaluation of peak inspiratory pressure and respiratory rate during ventilation of a preterm infant lung model with a self-inflating bag by paramedics of the Fire Department’, Revista Paulista de Pediatria, vol. 28. No. 1.
Not endorsed by but with thanks to Smiths Medical for providing information.
[tabbyending]
-

How to size and insert an OP airway adjunct (insertion only)
This video demonstrates how to insert an OP airway adjunct to an adult patient. A full video, showing how to size & insert the adjunct, along with information about relevant anatomy, is available on our YouTube channel. For more videos like this, stay tuned to www.article999.co.uk as well as the YouTube, Facebook and Twitter pages.
This is the shorter version of the OPA video. For the long version, featuring the when, where and how of OP airway adjuncts, please click here.
Menu
0:08 disclaimer
0:25 Seen this video before? Skip to the main content
0:33 Sizing the OPA
0:38 Inserting the OPA
1:01 References
Disclaimer
All of the content published by Article 999 follows reputable guidelines and are referenced. This video has not been endorsed by any organisation, author or ambulance trust. You must read the full disclaimer available at www.article999.co.uk/about/ (disclaimer tab) before putting into place anything you read or watch here. Please also remember to check your local guidelines before practicing any of these skills.
Transcript
Remember hand hygiene, bare below the elbows, and gloves in real life! (AACE, 2016)
Having opened the airway using manual airway manouvres and checking it is clear of obstruction, and having already selected the appropriate airway adjunct and size, now insert the adjunct back to front (Pilbery & Lethbridge, 2016) with the bendy part, named ‘the body’ (Beattie, 2005), curved towards the patient’s upper lip and nose. Once the adjunct has reached the soft palate, rotate it 180 degrees and advance it (Pilbery & Lethbridge, 2016). It should now rest in the pharynx (Pilbery & Lethbridge, 2016).
Made by www.article999.co.uk
Full disclaimer available at website.
References
Beattie, S. 2005. Placing an oropharnygeal airway, Available Online: http://www.modernmedicine.com/modern-… (Accessed 18/05/17)
Pilbery, R. and Lethbridge, K. 2016. Ambulance Care Practice, Bridgwater: Class Professional Publishing
Music:
Dobroide, 2010. 20091229.ambulance.siren.wav. Available Online: https://freesound.org/people/dobroide… (Accessed 21/08/17)
Productiontrax.com
Images:
Article 999’s own or licenses purchased via Adobe Stock & Dreamstime
Final note.
Why is it so important to size the adjunct? Because ‘If the airway [device] is too long it may occlude the airway by […] displacing the epiglottis; if too short it will not separate the soft palate or tongue from the posterior wall of the pharnyx’
Gregory, P. & Mursell, I. 2010. ‘Airway management’ in Manual of Clinical Paramedic Procedures, Sussex: Blackwell Publishing, pp. 2-34

This post has been peer reviewed by at least one other individual. Let us know what you think in the comments below. -
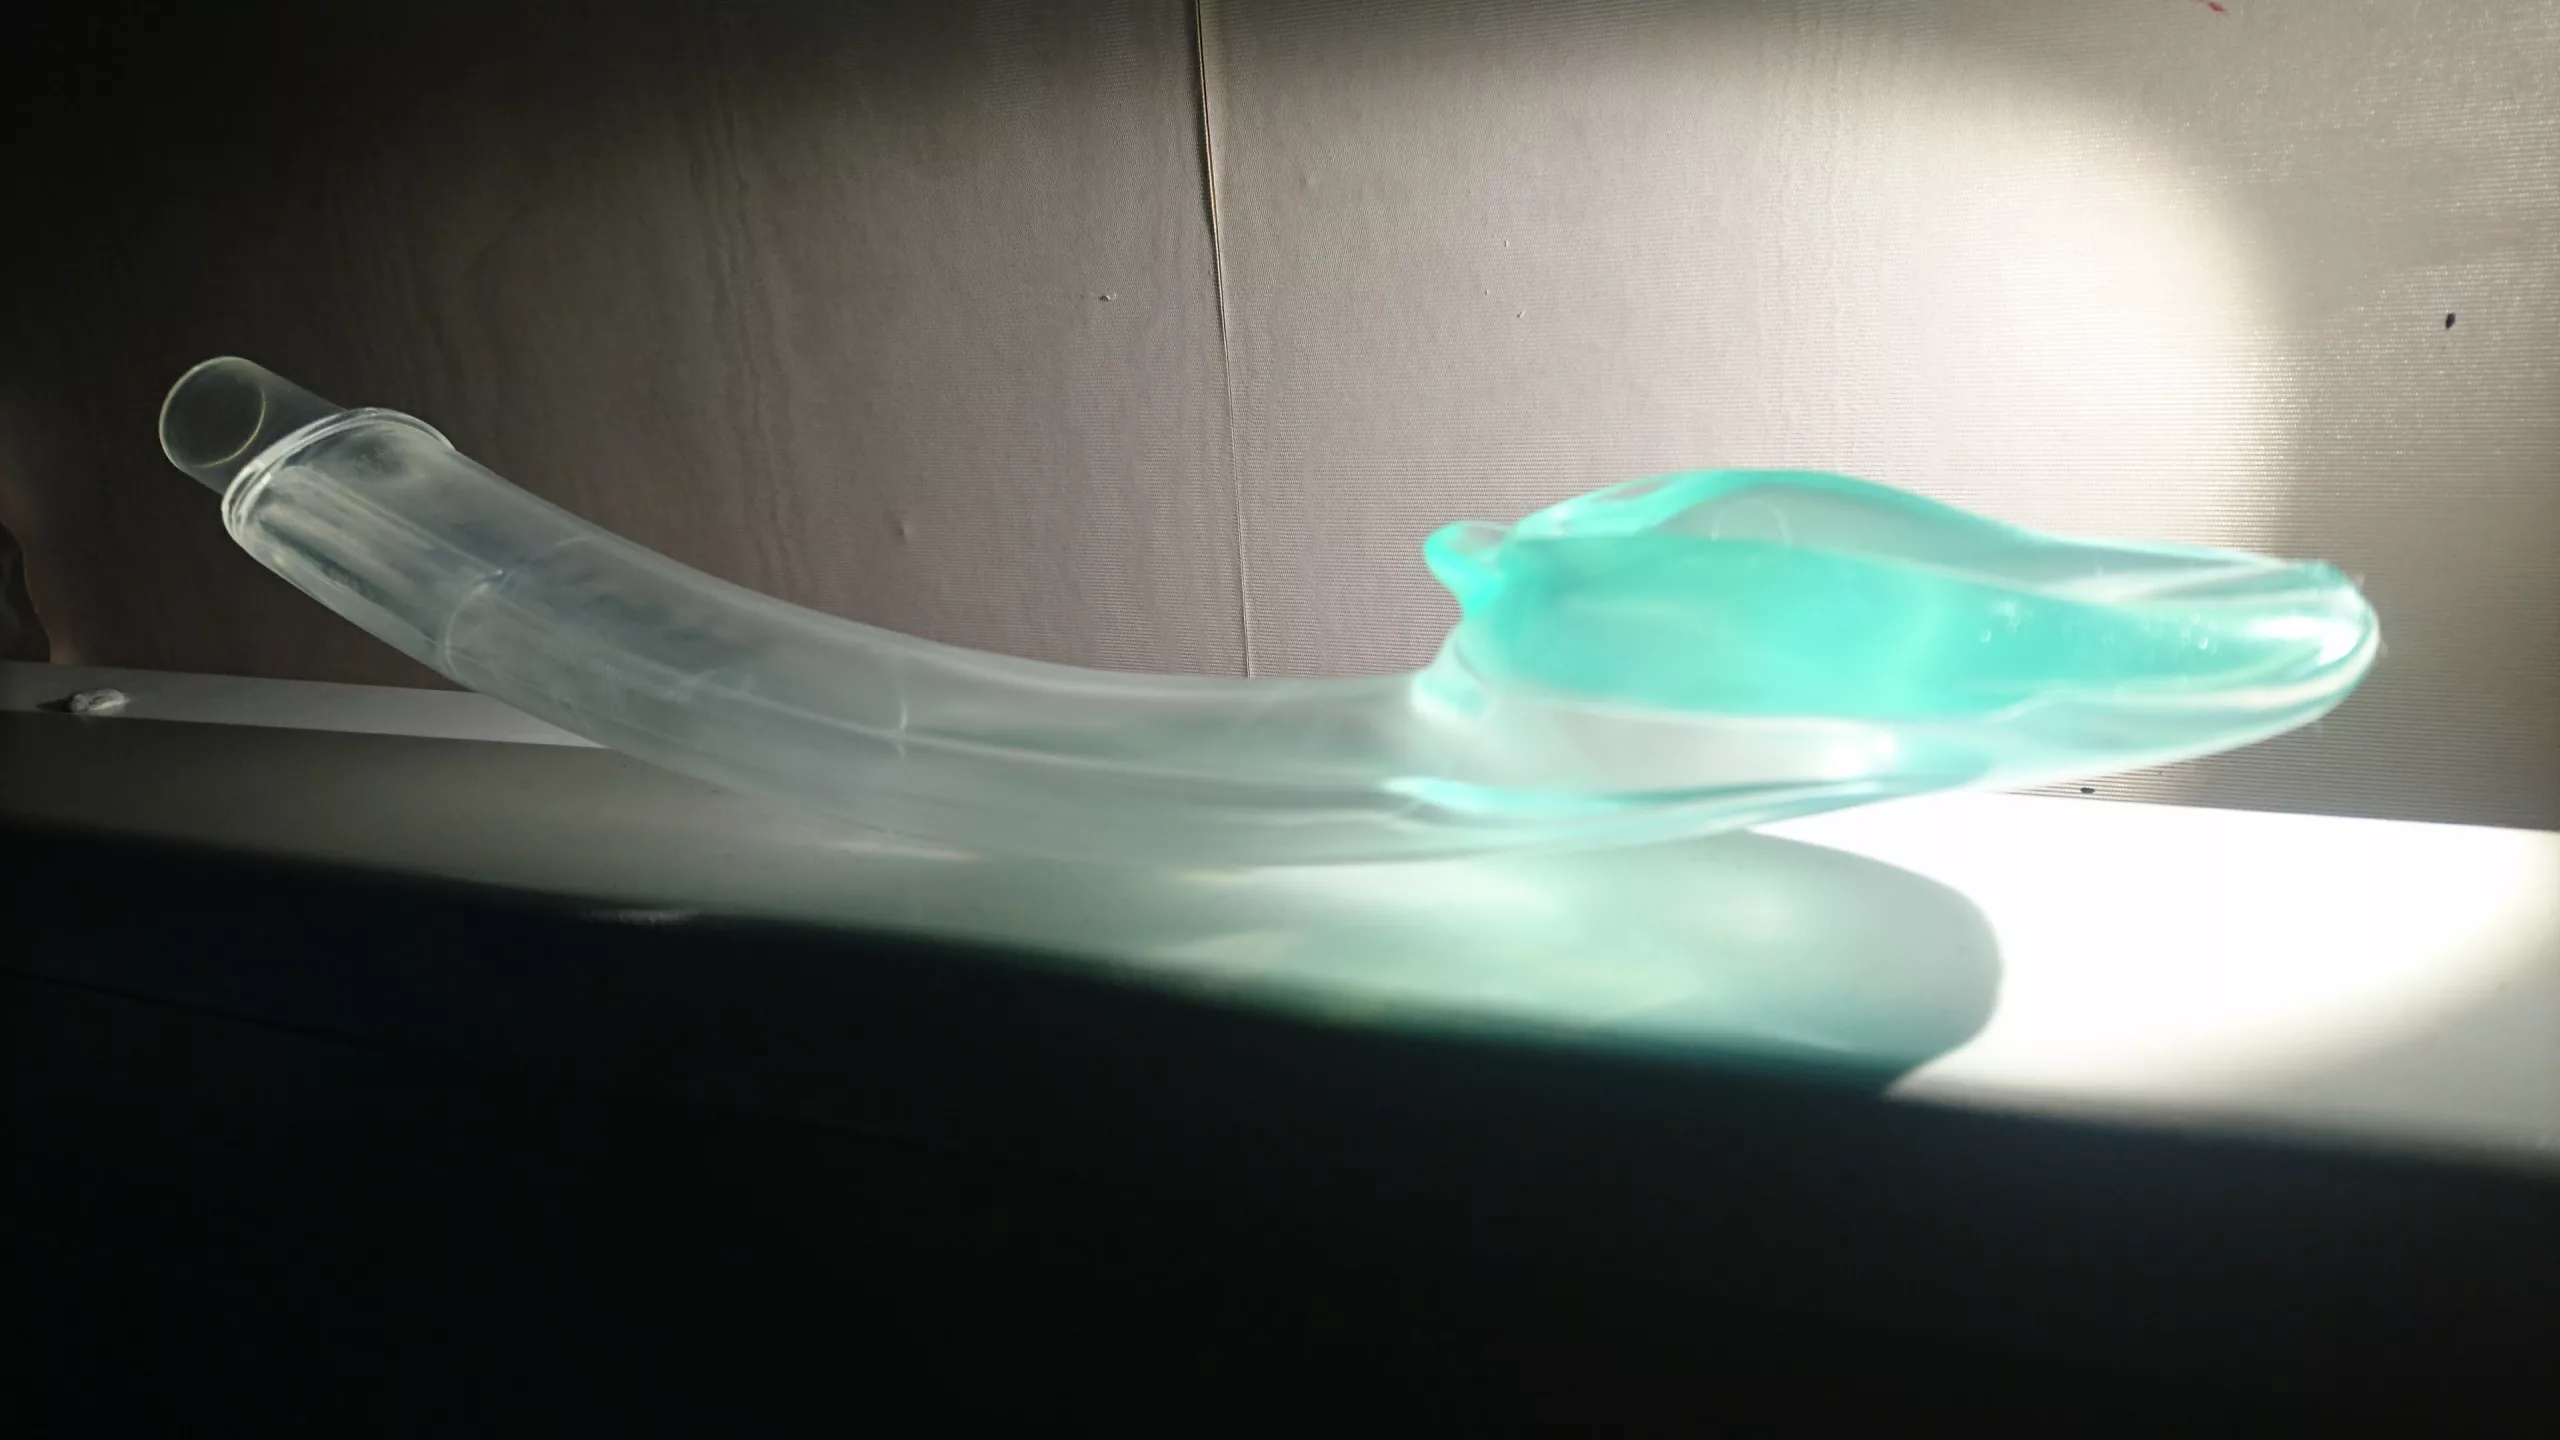
I-Gel: When, How?
This video shows only the when and how of I-Gels. To view a longer video, which contains the why, what, when and how, click here.
This version has been created to enable those of you who want to refresh yourself on only the need to knows – the use of the i-gel – to do so quickly and easily.
This video has not been endorsed by any organisation, author or ambulance trust. You must refer to local guidelines and read Article 999’s full disclaimer, available at www.article999.co.uk/about/ (disclaimer tab), before putting into place anything you see or read here.
This video has been peer reviewed by 2 or more individuals. No drastic changes have been suggested, so improvements will be made to future posts. -
I-Gel: Why, What, When, How?
Over the coming weeks and months, Article 999 aims to build a video library of skills and equipment, and in the future, scenarios. The aims are to make it easier for all operational staff to access refreshers or aid their training, while also enabling students to learn how to find and use equipment.
These videos should add to a resource that provides information that is easy to find and quick to learn from. Importantly, all of our videos have been produced based on publicly available information that is referenced, and all of them have been created by and for operational staff in the UK.
Feedback is welcome. As with all of our content, please remember to check local guidelines and read our full disclaimer before putting into place anything you see or read here.
Presenting one of our videos, I Gel: Why, What, When, How?
This video has been reviewed by one or more individuals. No drastic changes have been suggested but improvements will be made to future videos. Let us know if you have any feedback in the comments below. -

We interrupt these licensed images posts with…
Article 999, being a website designed to provide reasonably trustworthy answers to paramedic/EMT questions, along with fast facts and a soon to be launched video library, normally abides by the academic, very legal, I’m-spending-far-too-much-a-month-on-good-design-and-royalty-free-photos, but not today. Today, we bring you an incredibly useful alternative to the Wong-Baker FACES pain scale (Wong-Baker Faces, 2016), the ‘highly unofficial LEGO Pain Assessment Chart’ by Life of Dad (Moles, 2014).
Perhaps otherwise known as a gentle criticism to the Wong-Baker (2016) scale, I thought Article 999’s image collection would go amiss without this attractive alternative:
https://www.lifeofdad.com/more-proof-that-everything-is-better-with-lego/
If you want to find this scale on the go, simply type in Article 999’s search box, FACES, pain scale, or Lego. Go ahead, try it*
*Obviously not endorsed by any organisation. The image’s usefulness is judged by this paramedic alone.
References
Moles, Jason (2014) More Proof that Everything is Better with Lego, Available Online: https://www.lifeofdad.com/more-proof-that-everything-is-better-with-lego/ (Accessed 09/09/2017)
Wong-Baker FACES (2016) Wong-Baker FACES Foundation, Available Online: http://wongbakerfaces.org/ (Accessed 09/09/2017)